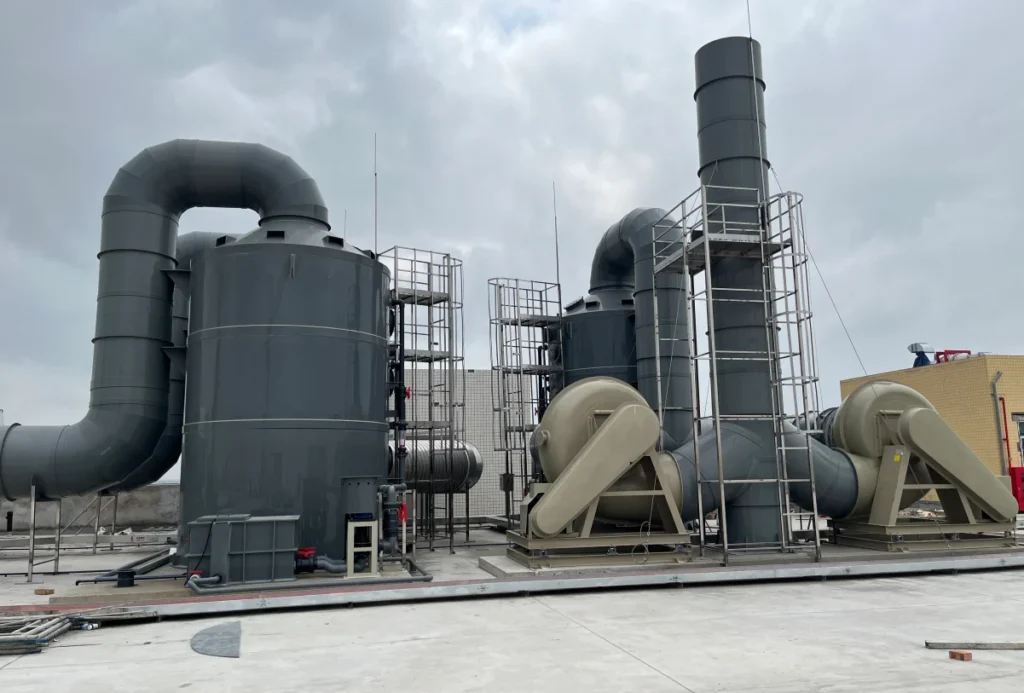
Key Takeaways
- PP duct fittings are not PP pipe fittings. Duct fittings are sized by air volume and velocity and are specified by outer diameter and wall; pressure-pipe fittings are sized by pressure class and nominal bore. The two families share a name and nothing else, and confusing them is the most common source of a wrong loss coefficient.
- Published coefficients for “a 90° elbow” span ζ 0.2 to ζ 1.5 — a 7.5× range — and the range is real. Radius ratio, joint type and manufacturing route explain it. The Hydraulic Institute itself states that wide differences exist in published coefficients and attaches uncertainty bands up to ±50%.
- Fittings, not duct, are the system. On a φ315 mm, 24 m run at 10 m/s with three 90° bends, a tee branch and two couplings, fittings account for 48% of the total loss with moulded long-radius bends and 78% with fabricated mitred bends.
- The elbow decision is a fan decision. The same run totals 141.5 Pa, 186.5 Pa or 330.5 Pa depending only on how the three elbows were made — 174 W, 230 W or 407 W of fan shaft power, a 233 W gap, or about 2,040 kWh a year on continuous duty.
- Radius ratio beats everything else on a bend. A moulded long-radius bend adds about 15 Pa at 10 m/s, a regular-radius bend about 30 Pa, and a fabricated mitre about 78 Pa. One mitred 90° is worth roughly 25 m of straight duct in pressure terms.
- Expansion is the expensive direction. A contraction is nearly free; an abrupt expansion costs ζ = [1 − (D₁/D₂)²]², so a φ110 → φ315 step (ζ 0.77) costs six times a φ250 → φ315 step (ζ 0.14). Expand one size at a time, and mark the flow direction on every reducer.
- A taper angle has an optimum, not a minimum. Keep a conical transition between 7° and 15° (ζ 0.13–0.30). Above about 50° a sudden enlargement performs as well or better than a cone, so a very wide transition is a false economy in material, length and pressure.
- Fittings are point loads. A φ315 long-radius bend weighs about 2.8 kg, and a flange pair adds another 3.5 kg — together 45% of a straight span’s hanger load in almost none of its length. Support each side of a fitting rather than relying on straight-run spacing.
- Specification, not shopping, is where the money is. Radius ratio, joint method, flow direction and bolt pattern are all decided on the drawing; every one of them is free to state and expensive to discover on site.
PP Duct Fittings: What They Are and What Each One Costs
A pp duct fittings enquiry normally arrives as a request for a list, and a list is the least useful thing this article can give you. What a designer actually needs to know is that the same nominal component — a 90° elbow in a given bore — can be supplied in forms whose published loss coefficients differ by more than a factor of seven, and that the difference is not an error in the tables. It is the radius ratio, the joint method and the manufacturing route, all of which are real and all of which are chosen at specification stage.
So the short answer is this: fittings are where most of the pressure in a duct run is spent, and they are one of the few places where the purchase decision and the running cost are the same decision. A moulded long-radius bend and a fabricated mitred bend occupy the same space, bolt to the same flanges and move the same air, and on a run that operates continuously the difference between them is a permanent line in the fan power. This article quantifies that line, component by component, and then tells you how to specify the fittings so they arrive as designed.
Why the published tables disagree so much
Search for a loss coefficient for a 90° elbow and you will find numbers from about 0.2 to about 1.5. Both ends of that range are correct, because the tables are describing different components under the same name. A flanged long-radius bend in a large duct is the 0.2. A threaded regular-radius elbow in a small pipe is the 1.5. Between them sit the radius ratios, the joint types and the surface conditions that a table entry cannot express, and the Hydraulic Institute, whose own tables are the most widely used, says plainly that wide differences are found in published values of the coefficient and attaches uncertainty bands as wide as ±50% to some of them.
That is not a reason to distrust the method. It is a reason to stop treating a coefficient as a property of a shape and start treating it as a property of a specification. Once the radius, the joint and the manufacturing route are fixed, the number stops being ambiguous, and the sections below show it becoming unambiguous.
What’s in this article
The article runs in four parts. It starts by separating PP duct fittings from the PP pressure-pipe fittings that share their name, because the two families get conflated constantly and the confusion produces wrong coefficients. It then sets out the eight fitting families — bends, tees, crosses, reducers, transitions, flanges, couplings and terminations — with the pressure figure for each, and it shows where that figure comes from by working both the coefficient method and the equivalent-length method and checking that they agree.
From there it moves to the decisions: moulded or fabricated, long radius or mitred, and where the boundary is between them. It works a complete φ315 mm run three times over with nothing changed but the elbow construction, and converts the difference into fan shaft power and annual energy. Finally it covers what the fittings do to weight and support spacing, the operating limits of a polypropylene fitting, how to size and route a run, how to specify and inspect, and what drives price and lead time.
Where this article stops
This is the system-level article for fittings, and it links out to the individual component pages for anyone who needs the specification of one part. It treats ventilation duct on a polypropylene fume or process exhaust system, at the velocities and pressures that duty implies, and it does not cover residential ductwork or liquid pressure pipe. Where the sizing decision belongs to the duct rather than to the fittings, the duct comparison articles carry that side of the calculation.
PP Duct Fittings Are Not PP Pipe Fittings
Search for pp duct fittings and most of what comes back is a different product. The pages rank, they load, they list fittings in every size, and they are describing pressure pipe fittings — the socket-fusion and butt-fusion components used to build a pressurised PP-R water or chemical line. A ventilation duct fitting shares the letters PP and almost nothing else.
The confusion is not the buyer’s fault. Both families are polypropylene, both are welded, both are sold by the same kind of supplier, and both appear on the same catalogue pages. The mistake becomes expensive at specification time, because the two families are sized by different inputs and fail in different ways.
What the Pressure-Pipe Tables Actually Describe
A PP-R pressure fitting is designed around an internal pressure. The wall thickness is derived from that pressure through a standard dimension ratio, so the wall grows as the diameter grows and as the pressure class rises. The joint has to hold the same pressure as the wall, which is why fusion welding — socket, butt or electrofusion — is the normal method and why threaded connections carry brass inserts. The bore stays small for the simple reason that a large-bore pipe at 10 bar is a heavy, expensive object with no application that justifies it, so the practical range stops somewhere around 160 mm.
The loss coefficients published alongside those fittings were measured on those joints. That matters, because the pipe-fitting tables distinguish sharply between joint types. A flanged 90° elbow and a threaded 90° elbow of the same nominal size and the same shape carry loss coefficients around 0.3 and 1.5 respectively — a five-fold difference produced entirely by how the fitting is attached. When those tables are applied to a duct, the threaded column is the wrong column, because nobody threads a ventilation duct.
What a Ventilation Duct Fitting Is Sized By
A duct fitting is designed around a different set of loads. The internal pressure is negligible — a fume exhaust system runs within a few kilopascals of atmosphere, and often under slight negative pressure. What the fitting has to survive is the chemistry inside it, the temperature, the weight of the fitting and the duct hanging from it, and the vibration of the fan. Wall thickness is not derived from pressure at all; it is set per diameter from a fabrication table, so a φ315 duct fitting has a 4.2 mm wall because that is the wall for φ315, not because a pressure calculation produced it.
The consequence for loss is that the design variable changes. In a pressure line, you choose a fitting to hold the pressure and then look up its loss. In a duct, the wall is already fixed, so the only real decision left is the fitting’s geometry — and geometry is the one thing that moves the loss by a factor of several.
A Decision Table on the Two Product Families
| PP pressure-pipe fitting | PP ventilation duct fitting | |
|---|---|---|
| Governing load | Internal pressure, PN10 / PN16 | Chemistry, temperature, self-weight, fan vibration |
| How wall is set | Derived from pressure class (SDR) | Fixed per diameter by fabrication table |
| Joining | Socket fusion, butt fusion, electrofusion; threaded with brass inserts | Hot-gas welding, extrusion welding, butt welding; flanged |
| Practical bore range | Commonly to about φ160 mm | φ20–500 mm moulded, larger fabricated |
| Sizing inputs | Pressure rating, flow, temperature de-rating | Diameter, velocity, chemistry, temperature, support |
| Standard reference | Pressure-pipe product standards | Thermoplastic duct welding standards and duct construction manuals |
| Typical failure | Burst or a weeping fusion joint | Wall thinning, a failed weld bead, or sagging between supports |
| Loss tables that fit | Pressure-pipe tables, threaded and fusion columns | Duct tables, and the flanged or welded columns of the pipe tables |
Everything below is about the right-hand column. Where a number is borrowed from a pipe-fitting table, it is the flanged or smooth-welded figure, and it is borrowed because the duct fitting’s joint is closer to that than to a threaded joint.
If you arrived here looking for the duct itself rather than the components, what a PP duct is and where it is used is the better starting point, and it covers the material and the size range that these fittings have to match.
The Eight Fitting Families and What Each One Does
A duct run is assembled from a small number of functional groups, and it helps to think of fittings by the job they do rather than by their shape. Every fitting in a chemical exhaust system falls into one of four jobs: it changes direction, it divides flow, it changes size, or it terminates or joins a length of duct. The eight families below cover those four jobs, and each has its own section further down this page with the numbers that matter.
Direction: Elbows
Elbows turn the run. They come in 90° and 45° as the standard angles, with any other angle fabricated to order, and each angle exists in a round version and a square or rectangular version. The single most important thing about an elbow is not its angle — it is the ratio of its centreline radius to its bore, because that ratio decides how much pressure the turn costs. This is where the moulded-versus-fabricated decision shows up most clearly, and it is covered in full in the 90 degree duct elbow specification page and the 45 degree duct elbow page.
Division: Tees and Crosses
A tee splits one stream into two or combines two into one, and a cross does the same in two planes at once. Both exist as equal fittings, where all ports share a bore, and as reducing versions, where the branch is smaller than the run. The thing to understand about a tee is that it does not have one loss coefficient; it has three, depending on whether the flow continues along the run, turns into the branch, or arrives from the branch into the run. The equal tee and reducing tee pages give the standard branch combinations we mould, and the duct cross page covers four-way junctions.
Size Change: Reducers and Transitions
Reducers step the bore up or down between two runs, and transitions change the section shape as well as the size — most often from a round duct to a rectangular hood or plenum connection. These fittings behave asymmetrically: reducing the bore is close to free, and increasing it is where the pressure goes. A duct reducer is a concentric or eccentric cone between two round ends; a square to round duct transition is fabricated from developed flat patterns and carries a rectangular flange on one end and a round one on the other.
Termination: Flanges, Plates and Couplings
These are the fittings that connect rather than redirect. A duct flange is the ring that bolts two components together and carries the bolt pattern; a flange plate is the flat weld-on disc used where a flange is built onto a duct end or a tank nozzle; and a duct coupling is the straight socket that joins two lengths of duct end to end. Flanges and couplings are where a designer has to make a choice that is only partly about pressure — accessibility, dismantling and inspection all push toward flanged joints, and the pressure penalty for that choice is real but small.
Two of the eight families are not moulded at all. Square and rectangular elbows, and square-to-round transitions, are always fabricated by hand from sheet and welded, because the tooling for a rectangular moulded fitting would have to be made for every width-and-height combination a customer might ask for. The oil and chemical plants we supply mostly mix the two: moulded round fittings on the long straight runs, fabricated square transitions at the process end where the equipment connections are rectangular.
The full range, with the standard sizes and the wall thickness for each diameter, is on the PP duct fittings range page. The rest of this article is the engineering that sits above that catalogue: what each fitting costs in pressure, how the manufacturing route changes that, and how to assemble a set that does not quietly multiply your fan power. Where the question is about the duct itself rather than the components — the resin, the grade, the wall table and the applications — the guide to polypropylene duct carries that side of it.
How a Fitting Becomes a Pressure Number
That conversion is only half of what a fitting does to a design, because the velocity pressure it multiplies is itself an output of the diameter choice. Every fitting loss rises with the square of the velocity, so the diameter that clears the transport floor with the least margin is also the one that charges the most for its bends and tees — and the fitting total then has to be added to the hood entry, the straight run, the treatment device and the stack exit before a fan can be selected. That budget, term by term, is worked through in our guide to PP duct sizing.
Before comparing fittings it is worth being precise about what a fitting “costs”, because the word is used loosely. A fitting does not have a price in pascals the way a length of duct does. What it has is a coefficient, and the number of pascals depends on how fast the air is moving through it. That single distinction explains most of the confusion in the published tables for pp duct fittings, and it is the reason two suppliers can quote the same component and be describing different losses.
The ζ Method
The standard approach expresses a fitting’s resistance as a multiple of the kinetic energy in the airstream. The dynamic pressure of a moving gas is ρv²/2 — density times velocity squared, over two. For air at 1.2 kg/m³ moving at 10 m/s that is 60 Pa. A fitting’s loss is its coefficient multiplied by that figure:
Δp = ζ × ρv²/2
The published coefficients vary by geometry. Taking air-duct values, a 90° bend with a sharp internal corner carries ζ = 1.3, the same bend rounded with a radius larger than the duct diameter carries ζ = 0.25, and a 45° rounded bend carries 0.05. At 10 m/s those are 78 Pa, 15 Pa and 3 Pa respectively. The same expression is the one OSHA uses in its ventilation guidance for a duct component: the entry loss of a hood is written as He = (K)(VP), with K the loss factor and VP the velocity pressure in the duct, which is a coefficient multiplied by the dynamic pressure and is the arithmetic just worked.
Notice what is absent from that equation. There is no diameter term. At a fixed velocity, a fitting of a given shape costs the same pressure whether it is 110 mm or 500 mm across. This surprises people who expect a big elbow to be “heavier” in loss terms, and it follows directly from the physics: the fitting’s penalty comes from accelerating and decelerating the gas, which is a velocity effect, not a size effect.
The Hydraulic Institute data tool sets out the same method for pipe systems and adds the straight-pipe term alongside it, so the whole system is one expression: friction along the pipe plus the sum of the fitting coefficients, all multiplied by the velocity head. Their note that resistance coefficients decrease as fittings get larger is worth remembering as a caveat rather than a correction — it means the tables tend to over-predict on large-bore duct.
The Equivalent-Length Method
The second method converts a fitting into an imaginary length of straight duct that would produce the same loss. It is popular with duct designers because the result is in metres, which is easier to add up and easier to draw on a layout. The conversion is straightforward once the friction factor is known: an equivalent length of L metres in a duct of internal diameter D produces the same loss as a fitting whose coefficient is
ζ = f × L / D
where f is the Darcy friction factor. Both methods describe the same physics; they differ only in which quantity is tabulated. For a smooth polypropylene duct the friction factor sits around 0.0157 at the Reynolds numbers a fume exhaust system runs at, and that single number lets the two sets of tables be compared directly.
Why the Published Tables Disagree by Up to 7×
Line up the tables and the spread is uncomfortable. For a fitting described simply as a 90° elbow, published coefficients range from about 0.2 to 1.5 — a factor of more than seven. It is tempting to conclude that the tables are unreliable and to pick a middle value. That would be a mistake, because the spread is mostly real and mostly explainable.
| What the table is describing | ζ | Loss at 10 m/s |
|---|---|---|
| 90° elbow, long radius, flanged or welded | 0.2 | 12 Pa |
| 90° bend, rounded, radius larger than the duct diameter | 0.25 | 15 Pa |
| 90° elbow, regular radius, flanged or welded | 0.3 | 18 Pa |
| 90° bend, rounded, radius smaller than the duct diameter | 0.5 | 30 Pa |
| 90° bend with turning vanes | 0.7 | 42 Pa |
| 90° bend with a sharp internal corner | 1.3 | 78 Pa |
| 90° elbow, regular radius, threaded | 1.5 | 90 Pa |
Three variables account for the spread, and all three are things a buyer controls.
Radius ratio. The single largest factor. A 90° bend whose centreline radius is larger than its diameter sheds roughly half the loss of an otherwise identical bend whose radius is smaller than its diameter, and the difference between a generous radius and a sharp corner is more than five-fold. The manufacturing route decides which of these you can buy, which is the subject of the next section.
Joint type. The pipe tables show a flanged 90° elbow at 0.3 and a threaded one at 1.5. The fitting geometry is the same; the entry and exit conditions are not. A threaded joint loses on the abrupt change of section at the threads and the roughness of the thread root. Flanged and welded joints do not.
Size. The Hydraulic Institute states plainly that resistance coefficients decrease as fittings get larger, and also that the published bend-curve data is not reliable below a radius ratio of 1 — which is exactly where a tight fabricated elbow sits. So on large-bore duct the tables over-predict, and on tight elbows they are extrapolating.
Two more honest caveats belong here. The Hydraulic Institute publishes the range of variation on its own coefficients, and it is not small: roughly ±10% for a 45° elbow, ±20% to ±40% for a 90° elbow depending on the fitting sub-type, and ±50% for couplings and reducers. And equivalent-length tables for thermoplastics are sometimes tabulated with the length-in-diameters held constant across sizes, which contradicts the size trend the Institute describes. Neither of these is a reason to abandon the method. They are the reason to treat the third figure as uncertain and to care a great deal about differences larger than the uncertainty band.
Note on the coefficient values The coefficients quoted in this article are nominal values from published air-duct and pipe-fitting tables, rounded as those tables print them. They are used here for their ordering and their relative size, which is stable across sources, rather than as precise design values: the published range of variation on a 90° elbow coefficient runs from ±20% to ±40% depending on the sub-type, and the sources disagree by up to a factor of seven on a fitting described only as a 90° elbow. Where a loss has to be defended to a client or a consultant, quote the specification behind it — radius ratio, joint type, manufacturing route — rather than the coefficient alone.
Reading a Fitting Loss Off Our Own Numbers
Putting the two methods together with our own duct data makes the numbers concrete. For our polypropylene duct the friction factor is 0.0157, the wall thickness for each diameter is fixed by the fabrication table, and the internal diameter follows from the wall. That is enough to express any fitting coefficient as a length of our duct.
| Bore | Wall | Internal dia. | Moulded long radius, ζ 0.25 | Moulded regular, ζ 0.5 | Fabricated mitred, ζ 1.3 |
|---|---|---|---|---|---|
| φ110 mm | 3.0 mm | 104.0 mm | 1.7 m | 3.3 m | 8.6 m |
| φ160 mm | 3.0 mm | 154.0 mm | 2.5 m | 4.9 m | 12.8 m |
| φ200 mm | 3.3 mm | 193.4 mm | 3.1 m | 6.2 m | 16.0 m |
| φ250 mm | 3.6 mm | 242.8 mm | 3.9 m | 7.7 m | 20.1 m |
| φ315 mm | 4.2 mm | 306.6 mm | 4.9 m | 9.8 m | 25.4 m |
| φ355 mm | 4.2 mm | 346.6 mm | 5.5 m | 11.0 m | 28.7 m |
| φ400 mm | 4.5 mm | 391.0 mm | 6.2 m | 12.5 m | 32.4 m |
| φ500 mm | 5.5 mm | 489.0 mm | 7.8 m | 15.6 m | 40.5 m |
Read the φ315 row and the scale of the choice becomes obvious. One fabricated mitred 90° elbow costs the same pressure as 25 metres of straight duct of the same bore. One moulded long-radius elbow costs what 4.9 metres costs. The two fittings occupy the same space in the layout, bolt to the same flanges, and carry the same air. The difference between them is how they were made.
That is the whole argument of this page, so the next section deals with manufacture directly. The physics used above is the standard Darcy–Weisbach formulation, and it is the same framework OSHA uses, where friction loss is defined as the static pressure loss caused by friction between the moving air and the duct wall and is expressed in inches of water gauge per 100 ft of duct or as a fraction of the velocity pressure per 100 ft, with the variables that set it named explicitly: the type of ductwork, the length of the run, the air velocity, the duct area, the air density and the duct diameter.
Moulded or Fabricated: the Choice That Sets the Loss
The tables in the previous section describe bend geometry, not material. That is the useful way to read them, because a duct fitting’s geometry is not a free design variable — it is a consequence of how the fitting is made. Polypropylene duct fittings come from three production routes, and each route can only produce certain shapes.
What Injection Moulding Gives You
An injection-moulded elbow is formed as a single piece in a steel tool. There is no joint anywhere in the body, so the bore is continuous and smooth from flange face to flange face, and the internal radius is whatever the tool was cut to. A tool can be cut with a generous centreline radius, which is how a moulded elbow lands on the low end of the coefficient range — around ζ 0.25 for a 90° turn rather than the 1.3 of a sharp one.
The mould also lets the wall be varied around the section. The outside of a bend works harder than the inside, and a moulded fitting can carry a thicker wall where the stress is instead of a uniform wall everywhere. The same tool produces every unit identically, so the hundredth elbow behaves like the first — which matters more than it sounds, because it means the loss coefficient you measure once is the loss coefficient you get.
The limits are equally clear. The tooling decides the sizes available, and each diameter and angle needs its own tool. That is why a moulded range stops where the demand for a given size stops being worth a tool, and why our moulded range extends to φ500 mm with larger sizes moving to fabrication. A one-off fitting in a diameter nobody else wants will not be moulded. What moulding buys is a low-loss geometric family, repeated exactly, at a unit cost that falls with quantity but with an entry cost that does not.
What Hot-Gas Welding Gives You
A fabricated fitting is built by hand from sheet or from pipe, joined with a hot-gas weld using a matching polypropylene rod. The process — heating the two surfaces and the rod together until they fuse — is a distinct family of thermoplastic welding methods with its own qualification and inspection regimes, and it is the only route that can produce an arbitrary shape.
That freedom is the whole point. A fabricated elbow can be made at any angle, not just 45° and 90°; at any diameter, including sizes no tool exists for; and in a rectangular section, where moulding would require a separate tool for every width-and-height combination. It is also the only route for a transition that changes section shape, because a square-to-round cannot be moulded in one piece at any sensible cost.
The costs of the route are a joint in the body and a dependency on the welder. Every fabricated fitting has a weld bead running along its bore at each component joint, and the quality of that bead — full penetration, no voids, correct fusion at the root — is a function of the operator and the procedure rather than of a tool. The fabricated fitting’s geometry is also usually tighter than a moulded one, because a tight elbow uses less material and less space, and tightness is exactly what the coefficient table punishes.
The important thing is that the tightness is a choice. A fabricated elbow can be built to a generous centreline radius if the drawing asks for it — the fabricator can develop the pattern for any bend radius. What usually happens instead is that the fitting is built to whatever radius satisfies the layout, which for a tight corner in a congested plant is often a small one. The radius ratio is therefore a line on the specification, and leaving it off is how a run ends up with a fabricated elbow at ζ 1.3 when it could have had one at ζ 0.25.
The Third Route: Mitred From Straight Pipe
There is a cheaper fabrication method that deserves separating out, because it is common and its pressure cost is the highest of the three. A mitred elbow is made by cutting straight pipe at an angle and welding the pieces back together. A 90° turn from two cuts needs two welds; from three cuts, three welds.
The advantage is material and labour: you consume roughly the length of the two chords rather than the developed length of a curved bend, which is a real saving. The advantage grows with diameter, because the material saving scales with the size of the fitting. The penalty is that the bore no longer turns smoothly. Each mitre leaves a sharp internal corner on the outside of the turn, and those corners are what the coefficient table is describing when it assigns a sharp 90° bend a value several times that of a rounded one.
Adding more cuts moves a mitred elbow back toward a smooth bend — more, shallower corners approximate a curve — and the same logic is why a sheet-metal bend with turning vanes sits between the sharp and the rounded figures. But adding cuts gives back the material and labour saving that made the method attractive, so a heavily segmented mitred elbow is the worst of both: it has the welds of fabrication and none of the savings. If a smooth bend is what the run needs, a moulded fitting or a fabricated fitting built to a generous radius is the honest way to get it.
Where the Radius Ratio Comes From
Pulling the three routes together, the choice narrows to one number. A fitted elbow’s loss coefficient is dominated by the ratio of its centreline radius to its bore. A moulded elbow’s ratio is fixed by its tool, and a good tool fixes it generously. A fabricated elbow’s ratio is whatever the drawing specifies. A mitred elbow’s effective ratio is set by how many cuts it has, and a two-cut mitre is the sharpest of all.
| Route | Typical radius ratio | Body joints | Available in | Loss coefficient, 90° |
|---|---|---|---|---|
| Injection moulded, single piece | Generous, set by the tool | None | Standard diameters to φ500 mm | ≈ 0.25 |
| Fabricated to a specified radius | Whatever the drawing asks | Welds along the bore | Any diameter, any angle, rectangular | 0.25–0.5 by specification |
| Fabricated tight to suit the layout | Small, radius near the bore | Welds along the bore | Any diameter, any angle | ≈ 0.5 or worse |
| Mitred from straight pipe | Set by the number of cuts | One weld per cut | Any diameter; cheapest in large bore | 1.3 or higher |
The next four sections take that table through the fitting families one at a time, starting with the elbow, where the spread is largest and the money is easiest to see.
Elbows: 90° and 45°, Long Radius and Mitred
Elbows carry most of the fitting loss in a typical exhaust run simply because there are more of them than anything else. A run that leaves a tank, crosses a plant and reaches a stack may have six or eight direction changes, and every one of them is a place where the loss coefficient is worth arguing about.
Why Radius Ratio Beats Everything Else
The centreline radius of a bend, divided by its bore, is the number that decides how much the turn costs. Two rows of the coefficient table make the point: a 90° bend rounded with a radius larger than the duct diameter carries ζ 0.25, and the same bend with a radius smaller than the diameter carries ζ 0.5. Doubling the radius ratio halves the loss. The ordering is not a table artefact: OSHA’s ventilation guidance lists ductwork with short radius elbows among the named causes of a system that does not perform, in the same list as branch entries that meet the main duct at sharp angles and a duct diameter too small for the airflow needed. Compare either with the sharp-cornered bend at ζ 1.3 and the range across one nominal fitting is more than five-fold.
The pipe-fitting tables reinforce the same message from a different direction. They list a flanged 90° elbow at ζ 0.3 and a flanged long-radius 90° elbow at ζ 0.2, while the threaded versions of the same two fittings sit at 1.5 and 0.7. So the tables agree on the ordering — long radius is better, smooth joints are better — and disagree on the absolute figures by amounts consistent with the ±25–35% uncertainty the Hydraulic Institute publishes for 90° elbows.
What matters for a polypropylene duct is which of these you can actually buy. Threaded joints do not exist in a duct, so the 1.5 figure is not available to you either as a risk or as a comparison. Flanged and welded joints do, which is the 0.2–0.3 group. And the radius ratio is a specification: a moulded duct elbow has a radius set by its tool, while a hand-fabricated welded elbow can be built to whatever radius the drawing calls for.
One Elbow Costs the Same Pressure as 25 Metres of Duct
The equivalent-length form makes the comparison visceral. On a φ315 mm duct with the 4.2 mm wall and a friction factor of 0.0157, the internal diameter is 306.6 mm, and one 90° elbow at ζ 1.3 has the same pressure loss as 25.4 metres of straight duct. The same elbow at ζ 0.25 has the loss of 4.9 metres.
Twenty-five metres is a long way. In most plants it is longer than the entire horizontal run between the process and the stack. It means a single fabricated mitred elbow is not a minor fitting detail that gets rounded off in the calculation — it can be the largest single pressure item in the system apart from the fan itself. The 90 degree duct elbow page lists the connection options and the diameters we mould.
The fan consequence is straightforward once the loss is known. The difference between ζ 1.3 and ζ 0.25 on that one φ315 elbow, in air at 10 m/s, is 63 Pa. Carrying 0.74 m³/s through it at a fan efficiency of 60% costs about 78 W of extra shaft power, which over 8,760 hours of continuous operation is roughly 680 kWh a year. Three elbows instead of one makes that about 2,000 kWh. At $0.10 per kWh the moulded elbows pay back their extra material within weeks, and the electricity bill is not a one-off.
The material side of the trade is smaller than it looks. A long-radius bend consumes its developed centreline length, which for a radius of one and a half diameters is about 2.36 diameters of wall. A two-cut mitre consumes roughly nine-tenths of a diameter. At φ315 that is 2.8 kg against 1.1 kg — about 1.7 kg of extra polypropylene per elbow, or $10–16 for a set of three at typical compound prices. Against roughly $200 a year of electricity, the comparison does not need a longer horizon than the first quarter.
45° Is the Cheap Turn
The 45° elbow is not simply a smaller version of the 90°. In the air-duct table a rounded 45° with a generous radius carries ζ 0.05, which is a fifth of the equivalent 90° and low enough that it is almost lost in the rounding of a system calculation. Even the sharp 45° at ζ 0.5 is a fraction of the sharp 90°.
That opens a design move worth knowing about. A 90° direction change can be built as two 45° elbows with a straight length between them, and on paper the pair costs two-fifths of a single long-radius 90°. There is a condition attached: bends placed closer together than a few diameters interact, and the combined loss is higher than the sum of the two. Share the straight section between them properly and the two-45 arrangement is genuinely better than one 90°; crowd them and it is not.
The 45 degree elbow is also the standard way to offset a run around an obstruction without introducing a pair of hard turns, which is where it earns its place in a layout most often.
Square and Rectangular Elbows
A rectangular elbow is a fabricated item in every case. It is built from sheet by hot-gas welding, and because there is no tool, its angle is a specification rather than a catalogue entry — a square duct elbow is normally made at 90° but can be made at any angle on request. The same radius-ratio logic applies to the internal turning vanes or the corner radius that the fabricator puts into the bend, and a rectangular elbow with an abrupt square corner is the worst case in this whole article.
Two practical details differ from the round case. The first is that the rectangular elbow’s flanges follow no single standard, so the bolt pattern has to be drawn and agreed rather than ordered by a designation — the flange section below covers why. The second is that the corner where two sheet walls meet needs enough weld to be structural, and a rectangular bend that is going to be under vibration benefits from an external stiffener across the outside of the turn. Fabrication lead time on a square elbow runs about 7 to 18 working days depending on complexity, against days for a moulded part from stock.
Tees and Crosses: One Fitting, Three Different Losses
Elbows are easy to reason about because the air either goes round them or it does not. Tees are harder, and the reason is that a single tee behaves as three different fittings depending on which way the air is travelling. Asking for “the loss coefficient of a tee” without saying which path is like asking for the pressure drop of a valve without saying whether it is open.
Run, Branch, and Branch Blanked
The published tables separate the cases, and the separation is not a detail. A flanged tee carrying flow straight through the run is listed at ζ 0.2. The same tee with flow dividing into the branch is listed at ζ 1.0. A thermoplastic equivalent-length table describes the same contrast in metres: a tee flow-through corresponds to about 20 diameters of straight pipe, and a tee branch flow to about 60. Both sources agree that turning into a branch costs three to five times what continuing along the run costs.
| Path through the tee | Typical ζ | Loss at 10 m/s | Equivalent duct at φ315 |
|---|---|---|---|
| Straight through the run, flanged or welded | 0.2–0.3 | 12–18 Pa | 3.9–5.9 m |
| Dividing into the branch, flanged or welded | 1.0 | 60 Pa | 19.5 m |
| Dividing into the branch, threaded | 2.0 | 120 Pa | 39.1 m |
Two practical consequences follow. The first is that the direction of the dominant flow should decide the orientation of the tee. Where one branch carries most of the air and the other is a small trim connection, the main flow should be the straight-through path, because that is the cheap direction. It sounds obvious written down and it is routinely missed on drawings, where the tee is placed to suit the pipe route rather than the flow split.
The second is that a tee is not a substitute for an elbow. A run that turns a corner through the branch of a tee pays about ζ 1.0 for the turn, where a proper elbow built to a generous radius pays about ζ 0.25. The tee is convenient because the spare port can be blanked, but convenience is being paid for at four times the pressure. Where a branch may be added later, the honest engineering is to fit the elbow now and cut in a tee when the branch is actually needed.
One arithmetic trap sits inside the branch figures. The air-duct table references its branch coefficient to the velocity in the branch, not the velocity in the run. If the branch is smaller than the run, the air speeds up as it turns, and the loss in pascals is calculated on the higher branch velocity. A branch that steps down by one size roughly doubles the dynamic pressure term before the coefficient is even applied.
Reducing Tees
A reducing tee combines a division with a change of bore, and the branch diameter is smaller than the run. We mould standard combinations including 200×160, 250×200, 315×200 and 400×250, with other pairings fabricated, and the standard branch angle is 90° with custom angles available. The reducing tee page lists the combinations and the connection options.
The loss of a reducing tee is the division loss plus a component from the size change, and the size-change part behaves the way the next section describes: a modest step is nearly free, and a large one is not. A branch that steps down two sizes in one fitting is doing the same thing to the air as a reducer working as an expander, and it carries the same penalty. Where the chemistry allows it, a gentler branch reduction — or a short tapered branch piece rather than a single large step — costs less than the fitting it saves.
Reducing tees are also the fitting where eccentricity matters. A concentric reducing tee keeps the branch on the run’s centreline, which is fine for a horizontal run carrying dry gas. An eccentric arrangement, where one wall runs straight through, is used where condensate has to drain along the bottom of the run without pooling at the branch — a detail that belongs in the specification rather than in the fabrication shop’s judgement.
Crosses
A duct cross has four ports at 90° to each other and divides flow in two planes at once. We mould equal-diameter crosses up to φ500 mm as single pieces, and fabricate reducing crosses and non-standard diameters. It exists for the case where two branch ducts have to meet a common header at the same point, and it earns its place when space is the binding constraint — one cross replaces two tees and the straight piece between them.
The pressure case for a cross is the weaker one, and it should be stated plainly. A single four-way junction concentrates two flow divisions into one plane, and two separate tees spaced a few diameters apart give a lower combined loss than the equivalent cross. Where the layout allows the space, two tees are the better engineering; where it does not, the cross is the right answer and the extra pressure is the price of the layout. This is one of the fittings where the decision is made by the plant, not by the duct.
The equal tee for a straightforward division is on the equal tee page, including the branch configurations we mould.
Reducers and Transitions: Where the Loss Really Sits
A reducer is the one fitting where the direction of flow through it changes the answer by several times, and it is worth being precise about which direction you have. The same component working as a contraction and as an expansion are not the same fitting at all.
Contraction Is Cheap, Expansion Is Not
The published air-duct table assigns a tapered reduction a coefficient of zero. That is an idealisation — no real fitting is perfectly lossless — but it points in exactly the right direction, and it is easy to see why. When air accelerates into a smaller section the pressure gradient is favourable: the airstream is being pushed into the wall rather than pulled away from it, and it stays attached. When air decelerates into a larger section the pressure gradient is adverse, the boundary layer separates from the wall, and the separation is what you pay for.
The penalty for an expansion can be calculated from the area ratio. For an abrupt enlargement the coefficient is the square of one minus the area ratio:
ζ = [1 − (D₁/D₂)²]²
where D₁ is the smaller and D₂ the larger diameter. The square is what makes the numbers move so fast.
| Transition | Area ratio | ζ, abrupt | Loss at 10 m/s |
|---|---|---|---|
| φ250 → φ315 mm | 0.63 | 0.14 | 8 Pa |
| φ200 → φ315 mm | 0.40 | 0.36 | 21 Pa |
| φ160 → φ315 mm | 0.26 | 0.55 | 33 Pa |
| φ110 → φ315 mm | 0.12 | 0.77 | 46 Pa |
| φ315 → φ500 mm | 0.40 | 0.36 | 22 Pa |
Never Step More Than One Size
Read the first four rows together. All four of them arrive at a φ315 outlet, and the loss varies from 8 Pa to 46 Pa purely because of how far the air had to climb in one step. The φ110 to φ315 transition costs nearly six times what the φ250 to φ315 transition costs, for the same endpoint.
The rule that follows is simple enough to write on a drawing: expand by no more than one standard size in a single transition. Where the geometry demands a bigger step, use two reducers with a short straight section between them, or ask for one reducer with a longer taper. Two φ160-to-φ200-to-φ250-to-φ315 steps in series cost far less in total than a single φ160-to-φ315 jump, and the extra fittings are cheap compared with the fan power they save.
The same caution applies to a reducer installed the wrong way round. A component sold as a reducer is a symmetric cone, and a fitter working from a layout drawing that does not mark the flow direction can install it as an expander without anything looking wrong. A φ315 to φ160 reducer, correctly oriented, is close to free. Reversed, it is a φ160 to φ315 expansion at ζ 0.55. Mark the direction of flow on the reducer on the drawing and again on the component before it leaves the factory.
Taper Angle, and the 50° Rule
A gradual cone is not automatically better than an abrupt step, which is the counter-intuitive part. The Hydraulic Institute gives a coefficient for a conical increaser as a function of the total included angle, and the numbers rise steeply with the angle.
| Included angle | ζ, conical increaser |
|---|---|
| 7.5° | 0.13 |
| 10° | 0.18 |
| 15° | 0.30 |
| 20° | 0.42 |
| 30° | 0.70 |
| 35° | 0.86 |
The same source notes that above about 50° a sudden enlargement is as good as, or better than, a conical increaser. The physical reason is that a very wide cone creates a large low-velocity recirculation zone along its walls, and that zone costs more than the abrupt step’s own separation does. A wide-angle transition cone is therefore a false economy: it uses more material, occupies more length, and loses more pressure than the square step it replaced.
For design purposes, keep the included angle between about 7° and 15°. At 15° the penalty is ζ 0.30, which for a φ315 run is roughly 6 metres of equivalent duct. At 30° it doubles to 0.70, or about 14 metres. Anywhere beyond 35° the cone formula stops applying and the honest answer is to shorten the transition instead of extending it.
Square to Round
The transition from a round duct to a rectangular hood or plenum connection is the most labour-intensive fitting in a duct catalogue, because it cannot be moulded. A square to round duct transition is fabricated by hand from developed flat patterns, welded along every seam. Our standard construction uses eight segments — four corners and four sides — which is the practical compromise between a smooth transition and a manageable number of welds, and fabrication lead time runs about 10 to 20 working days against days for a moulded part.
The taper-angle rule above applies here directly, and it is worth checking rather than assuming. Our standard transition length is one and a half times the round-end diameter. For a φ315 round end feeding a 400 mm rectangular end, that length gives an included angle of about 10°, comfortably inside the good band at ζ 0.19. For the same φ315 round end feeding a 500 mm rectangular end, the same 472 mm length gives about 22°, where the cone coefficient is 0.48 — two and a half times the loss, from nothing but the size of the rectangle on the other end.
The fix is not to abandon the standard but to know when it stops applying. Where the rectangular end is much larger than the round one, ask for a longer transition. The extra sheet and welding is a small one-off cost against a permanent pressure penalty, and it is the kind of change that has to be made before the fitting is built rather than after. The duct reducer page covers the round-to-round case for comparison.
Flanges and Bolt Patterns
A flange is the fitting that decides whether a duct run can be taken apart. That sounds like a maintenance detail and it is, in fact, a specification decision with a pressure, a weight and a dimensional consequence — and on rectangular duct it is also the fitting most likely to be wrong when it arrives.
Round: the Standards That Exist
Round duct flanges follow published drilling patterns, and the practical choices are ANSI 150, DIN and JIS, plus custom patterns where a project standard requires one. We mould single-piece flanges up to φ500 mm and fabricate larger ones from sheet, and the standard types are weld neck, slip-on and blind. A duct flange is the ring that carries the bolt pattern and closes the joint; a flange plate is the flat weld-on disc used where a flange is built onto a duct end, a tank nozzle or a fan inlet.
Choosing a standard rather than a custom pattern is worth doing whenever the project permits it, for a reason that has nothing to do with pressure. A standard pattern can be bolted to any compatible flange from any supplier, which means a spare fitting or a replacement spool can be bought without a drawing. A custom pattern is a permanent dependency on whoever holds the drawing.
Rectangular: the Standard That Doesn’t
There is no useful international standard for a rectangular duct flange, because the bolt pattern depends on the width and height of the particular duct. The drilling has to be specified per joint, and that makes every rectangular flanged connection a drawing agreement between the duct fabricator and whoever supplies the mating flange, hood or plenum. The consequence is mundane and expensive: a rectangular flange made to a pattern that the other party did not use is a fitting that cannot be bolted to anything.
The face width on a fabricated rectangular flange is typically 30 to 50 mm, and that dimension is a compromise between stiffness and weight rather than a standard. Two habits prevent most of the problems. First, fix the bolt pattern at order stage with a dimensioned drawing, not a note saying “standard”. Second, dimension the bolt holes from a corner of the rectangle rather than from its centreline. Centreline dimensions are ambiguous on a rectangular section the moment the two parties draw it from different edges, and corner dimensions are not.
Rectangular duct also needs a stiffener rather than a heavier flange where a joint will see pressure or vibration. A flat flange plate on a large rectangular duct bows between the bolts, which opens the joint at the middle of the long side. A light angle or flat bar welded across the outside of the flange stops that far more cheaply than increasing the plate thickness does.
Gaskets, Bolting and Face Width
A flange joint needs a gasket compatible with the chemistry and the temperature inside the duct, and the gasket is the component most often chosen last and specified least. A full-face gasket that covers the whole flange rather than a ring inside the bolt circle is the safer default on a thermoplastic flange, because it spreads the bolt load over more of the plate and reduces the local crushing around each hole.
Bolting on polypropylene needs one habit that steel duct does not. Polypropylene creeps under sustained load, so a bolted PP flange loses some of its preload over time as the plastic relaxes under the bolt heads. The standard practice that answers this is to use load-spreading washers, torque the joint to a figure the flange can take rather than the maximum the bolt can take, and re-torque after the first thermal cycle. A flange that was tight on commissioning day and has not been touched since is a common source of a slow, hard-to-find fume leak, and re-torquing once after the first heat-up costs almost nothing.
What a Flange Pair Costs
The loss tables do not list a separate coefficient for a flange pair, and it is worth knowing that so you do not add one twice. The pressure cost of a flanged joint is already inside the flanged fitting figures — the tables’ flanged columns are the ones to use, and no additional flange term is added on top. Treating a flange as an extra minor loss is double counting.
What a flange pair genuinely costs is weight and a leak path. At φ315 mm a flange ring in 20 mm plate with an outside diameter one and a half times the bore weighs about 1.8 kg, so a flanged elbow carries roughly 3.5 kg of flange rings in addition to its own 2.8 kg of body. That is a mass that hangs at a single point in the run and has to be supported, and it is treated in the support section below. The leak path is the trade for the accessibility: a welded joint cannot leak at a gasket and cannot be dismantled either.
Where the chemistry is aggressive, the flange is also where the material specification has to be explicit. The polypropylene grades used for duct and for moulded fittings are defined by published materials specifications that classify the resin by its properties, and a claim to “virgin-grade polypropylene” is checkable against them rather than taken on trust.
Couplings, Joints and Weld Quality
Weld quality becomes a material question as well as a workmanship one once the duct is made from a flame-retardant compound. Joint strength in that grade is normally quoted at around 80 to 90% of parent material against roughly 85 to 95% for the standard grade, because the filler content interrupts the chain interdiffusion across the weld interface, and the filler rod has to be the same grade as the duct or the joint carries a band of unrated material through the whole system. What the grade changes in fabrication is set out in our guide to a flame retardant PP duct.
Every run has more joints than it has of any other fitting, so it is worth knowing that joints are also among the cheapest fittings in pressure terms — and knowing the specific case where that stops being true.
Socket Weld and Butt Weld
A duct coupling is the straight socket that joins two lengths of duct end to end. Ours comes in two forms: an injection-moulded single piece with concentric bores, or a fabricated version rolled from sheet with a longitudinal seam weld. Either can be joined to the duct by socket welding or by solvent bonding.
The two joining methods are not equivalent in pressure terms, and the difference is easy to miss because both look like a straight joint on a drawing.
A socket joint inserts the duct end into a socket and welds in the annular gap. It is the tolerant method: the socket holds the two lengths aligned, and a slightly out-of-square cut still closes. Its pressure cost comes from the socket itself. The bore through a socket is larger than the duct bore because the duct wall has to fit inside it, so the air expands into the socket recess and contracts back out of it at every joint. Each is a small expansion and a small contraction, both at the same place, and both of the kind the previous section showed to be direction-sensitive. One socket joint is negligible. Forty of them on a long header is not, and it is invisible in a calculation that treats every joint as a coefficient of nearly zero.
A butt joint squares the two duct ends, aligns them and welds them directly, leaving a flush bore with no recess. Its loss is lower — there is no expansion to pay for — but it demands a square cut and good alignment, because misalignment at a butt joint presents a step to the flow that a socket would have absorbed. In practice the choice is made on site conditions: socket welding indoors with good access, butt welding where a flush bore matters or where the duct is too large to socket.
What a Weld Bead Is Worth in Pressure
A hot-gas weld leaves a bead along the joint. On the outside it is reinforcement. On the inside, at a butt joint, it is a local protrusion into the bore, and the questions worth asking are how much pressure it costs and whether it can be dressed back.
The published coupling figures are low — a threaded union is listed at ζ 0.08, and equivalent-length tables put a straight coupling at a small fraction of a 90° elbow — but the Hydraulic Institute attaches a ±50% uncertainty to its coupling coefficients, the widest band in its tables. That combination tells you what you need to know: a good straight joint is one of the cheapest items in the system, and a bad one is not bounded by the table at all. A partially penetrating weld, a void, or a bead protruding several millimetres into the bore is not a coefficient problem, it is a defect, and dressing an internal bead back flush is a fabrication instruction rather than a design one.
The joint count question resolves with arithmetic. Polypropylene duct is supplied in 3 metre lengths, so a 24 metre straight run has seven joints against three elbows. At a coupling coefficient near 0.08 the joints contribute about 0.56 in total — roughly the same as two long-radius elbows, and less than half of a single mitred one. The picture changes on long headers: a 100 metre run has 33 joints, and their combined coefficient of roughly 2.6 exceeds the loss of a fully mitred elbow twice over. On a long straight header, the joint method is worth specifying. On a short process connection, it is not.
How a Weld Is Checked
Thermoplastic duct welds are not inspected the way steel pipe welds are, and a specification that asks for radiography is asking for something that is not routinely done on polypropylene. The quality system works through three controls instead, and it is worth knowing them because they are what a supplier’s certification actually covers.
The first is procedure qualification: the welding parameters — hot-gas temperature, feed rate, rod material, preparation and fit-up — are fixed and qualified for the material and thickness range. The thermoplastic welding standards are the reference framework for hot-gas and extrusion welding of polyolefins, and they are what a supplier’s welding procedure should be written against. The second is welder qualification, because a manual process depends on the operator; the welders who build our fittings average about eight years of polypropylene-specific fabrication experience, and that figure is worth asking for from any supplier. The third is testing: a visible bead inspection on every weld, and destructive bend or tensile tests on sample welds cut from the same procedure and made by the same welder, which is how a fabrication shop demonstrates that its procedure is actually producing sound joints.
What a buyer should ask for is therefore not a radiographic report but the procedure, the welder qualifications behind it, and the sample test results. A supplier who has all three will produce them without difficulty.
Adding Fittings Up Across a Real Run
The individual coefficients matter less than what they do when they are summed. A short worked example shows how quickly a fitting decision becomes a fan decision, and how much of the total loss a straight run of duct actually accounts for.
The Run and the Assumptions
Take a φ315 mm polypropylene exhaust run: 24 metres of straight duct, three 90° elbows, one tee taking a branch, and two couplings. The assumptions are stated so the arithmetic can be checked. The duct has a 4.2 mm wall, giving an internal diameter of 306.6 mm and a cross-section of 0.0738 m². The air is at 1.2 kg/m³ and moves at 10 m/s, which gives 0.738 m³/s, or about 2,660 m³/h, and a dynamic pressure of 60 Pa. The friction factor for our duct is 0.0157, and the fan is taken at 60% overall efficiency.
Only one thing changes between the three columns below: how the elbows were made. Every other fitting, the run length, the velocity and the duct are identical.
Three Fitting Sets, Three Answers
| Item | Moulded long radius | Moulded regular | Fabricated mitred |
|---|---|---|---|
| Straight duct, 24 m | 73.7 Pa | 73.7 Pa | 73.7 Pa |
| Three 90° elbows | 45.0 Pa | 90.0 Pa | 234.0 Pa |
| Tee, branch flow | 18.0 Pa | 18.0 Pa | 18.0 Pa |
| Two couplings | 4.8 Pa | 4.8 Pa | 4.8 Pa |
| Total system loss | 141.5 Pa | 186.5 Pa | 330.5 Pa |
| Fittings as a share of the total | 48% | 60% | 78% |
| Fan shaft power at 60% efficiency | 174 W | 230 W | 407 W |
The first thing the table shows is that fittings, not duct, are the system. Even in the best column the straight 24 metres contribute 74 Pa out of 141.5, and in the worst column they are less than a quarter of the total. A designer who spends an afternoon optimising duct length and then accepts whatever elbows the fabricator supplies has optimised the smaller term.
The second thing is the size of the spread. The fabricated-mitred column is 2.34 times the moulded long-radius column, and the difference is entirely in three items that occupy the same space and bolt to the same flanges. A fan selected for 141.5 Pa will not move the design flow against 330.5 Pa. It will sit further back on its curve, deliver less air than the process needs, and the process will be the thing that discovers it.
What That Does to the Fan
The power difference between the two outer columns is 233 W of shaft power. On continuous duty that is about 2,040 kWh a year. Electricity at $0.10 per kWh makes it about $204 a year, and at $0.12 about $244; a two-shift site running 6,000 hours rather than 8,760 sees about $140. The rate and the hours are the reader’s to supply, but the 233 W is not — it follows from the geometry and the velocity.
It is worth seeing what happens when the elbow count goes up, because that is the real multiplier. Doubling the elbows to six, with everything else unchanged, takes the moulded long-radius run to 186.5 Pa and 230 W, and the fabricated-mitred run to 564.5 Pa and 695 W. The fan grows by 465 W between those two versions of the same layout. Long runs with many direction changes are where the fitting decision stops being an engineering nuance and becomes the largest single line in the fan selection. Where the fan sits is part of the same decision: OSHA’s ventilation guidance warns that system effect loss is significant if any elbow is connected to the fan at inlet or outlet, and prescribes a six-and-three rule for the straight run — a minimum of six duct diameters at the fan inlet and three at the outlet — so that a low-loss fitting is not asked to work in the disturbed airstream next to the fan.
The velocity choice multiplies into the same figure, because every fitting loss scales with velocity squared. Moving the design velocity from 10 to 12 m/s raises the airstream’s dynamic pressure from 60 to 86.4 Pa, and every coefficient in the table above is multiplied by 1.44 before any fitting is chosen. The velocity decision and the fitting decision compound, which is why the sizing section below puts velocity first.
The straight-duct figures here use our own duct data, and the same friction factor and weight figures are worked through in the comparison with galvanized duct and in the PP duct range if you need the duct side of the calculation rather than the fittings.
What Fittings Do to Weight and Support Spacing
Pressure is only one of the two costs a fitting carries. The other is mass, and mass arrives at a single point in the run rather than being spread along it. A fitting is a lump of polypropylene wall thickness concentrated where the duct changes shape, and in the two worst cases it also brings flange rings and a bolt pattern with it.
The Mass of a Bend
The mass of a fitting follows from its developed centreline length multiplied by the duct’s mass per metre, and the centreline length is set by the radius ratio. That is the same variable that set the pressure loss, which is a useful coincidence: the bend geometry that is cheapest in pressure is also the heaviest in material.
For a 90° bend the centreline arc is π/2 times the centreline radius, so a long-radius bend at one and a half diameters has an arc of 2.36 diameters, a regular one at a single diameter has 1.57 diameters, and a two-cut mitre — which cuts the corner rather than following an arc — develops roughly 0.9 diameters. Using our own published duct weights per metre, the bend masses come out as follows.
| Bore | Duct mass | Long radius | Regular radius | Mitred (two cut) |
|---|---|---|---|---|
| φ110 mm | 0.94 kg/m | 0.24 kg | 0.16 kg | 0.09 kg |
| φ160 mm | 1.37 kg/m | 0.52 kg | 0.34 kg | 0.20 kg |
| φ200 mm | 1.89 kg/m | 0.89 kg | 0.59 kg | 0.34 kg |
| φ250 mm | 2.57 kg/m | 1.51 kg | 1.01 kg | 0.58 kg |
| φ315 mm | 3.78 kg/m | 2.81 kg | 1.87 kg | 1.07 kg |
| φ355 mm | 4.26 kg/m | 3.56 kg | 2.38 kg | 1.36 kg |
| φ400 mm | 5.15 kg/m | 4.85 kg | 3.24 kg | 1.85 kg |
| φ500 mm | 7.86 kg/m | 9.26 kg | 6.17 kg | 3.54 kg |
The table is a geometry estimate rather than a weighing of every part, and it is worth reading as such — an injection-moulded bend carries a wall that is locally thicker through the throat, and a fabricated one carries weld bead along its seams. Both push the real figure slightly above the arc figure. What the table does show correctly is the ratio: the long-radius bend is 2.6 times the mass of the mitre at every diameter, because the 2.36 to 0.9 ratio in developed length never changes.
At the small end that difference is a few hundred grams and nobody cares. At φ500 it is 5.7 kg on a single bend, and a run with eight of them is 46 kg of elbow that the support design did not expect if the layout was priced on mitres.
A Flange Ring Is Not Free
A flange pair adds mass that is pure support load and carries no air at all. Taking a φ315 flange ring in 20 mm plate with an outside diameter one and a half times the bore, the ring weighs about 1.8 kg and the pair about 3.5 kg.
Bolted to a long-radius moulded elbow, that takes the fitting from 2.81 kg to about 6.35 kg — the flanges weigh more than the bend. For comparison, the support table in the installation guide gives a φ315 hanger load of 14.2 kg for a support holding a straight span, so a single flanged elbow accounts for 45% of that while occupying almost none of the span’s length.
This is not an argument against flanges. It is an argument for putting a support where the flanges are, and for not letting the flange decision be made after the support layout is fixed. A flanged joint that is going to be opened for maintenance is also going to be opened by someone standing on a ladder with both hands occupied, and the support has to be there before the bolts come out.
Putting a Hanger on Each Side of a Fitting
The support rule that follows is the one the installation section states generally and that matters most at fittings: shorten the spacing where the duct carries a fitting, and put a hanger immediately either side of it. A fitting is a point load in a run that everything else treats as distributed, and a span that is correctly supported for straight duct is not correctly supported once a 6 kg elbow with two flange rings sits in the middle of it.
Two further details are worth writing into the layout. A fabricated square-to-round transition is heavier than the round bend it replaces, because it is built from sheet with seam welds and often carries a rectangular flange face at one end; it should be treated as a heavy fitting, not as a transition. And a flanged joint positioned directly under a hanger puts the hanger’s load through the gasketed joint rather than through the duct wall, which is the one place a support should never be. The gap between two hangers is the right home for a flange.
None of this is pressure engineering. It is the part of the fitting decision that shows up on a site visit rather than in a calculation, and it is the reason the mass figures above are worth having before the layout is drawn rather than after the first span sags.
The Limits of a PP Duct Fitting
A fitting is not a short piece of duct. It is a shape, and a shape has limits that come from somewhere different than a straight wall’s limits do: the joint, the mould, the chemistry at the weld, and the velocity through the throat. Four limits govern pp duct fittings, and only one of them is set by the calculation.
Temperature: the Joint Governs, Not the Wall
The published range for our duct fittings is −10 to +90 °C, and that is the figure to design to. It is worth knowing how it relates to the numbers quoted for the resin itself, because the two are sometimes quoted as if they were interchangeable. Polypropylene homopolymer is frequently discussed in a continuous band of 90 to 100 °C, and vendors quote figures spanning roughly 80 to 100 °C depending on grade and duty. Those are figures for the material, measured on a test specimen or a straight extrusion.
A fitting is not a specimen. It is a moulded or welded shape, and its governing limit is the joint rather than the wall. A weld bead, a socket recess and the material reflowed around them are where a fitting first shows the effect of sustained heat: the polymer relaxes, the joint creeps, and the shape that carried the load cold starts to move. Designing a fitting run at 95 °C because the resin data sheet permits it leaves nothing in hand for the joint. Designing at 90 °C and below does not.
The same mechanism is why a bolted flange wants re-torquing after the first thermal cycle, as the flange section above sets out: the plastic relaxes under the bolt load, and the joint that was tight when it was cold is no longer tight when it is hot.
Size: Moulded to φ500, Fabricated Above
We mould fittings single-piece up to φ500 mm and fabricate above that, and the switch is not a marketing boundary — it is where the tooling and the machine capacity end. A moulded fitting has no internal joint anywhere in the flow path, which is the property worth paying for at the sizes where it exists. Above φ500 mm the fitting is built up from sheet and welded, and the loss and the leak risk both change character with the method.
Rectangular fittings sit outside this entirely, because there is no mould for a shape that is specified per project. A fabricated square-to-round transition or rectangular elbow is made from developed flat patterns and seam welds, and its cost and lead time are fabrication costs rather than tooling costs. That is the honest reason rectangular ductwork is more expensive per joint than round.
Chemistry: the Weld Bead Is the Exposed Surface
Polypropylene handles a wide range of aggressive media, and the published figures for our material are the ones to work from: hydrochloric acid below 80%, sulphuric acid below 75%, and nitric acid below 20% at 60 °C. Inside a fitting, the surface exposed to that medium is not only the moulded wall. At a socket weld and at a butt weld, the weld bead and the reflowed material sit in the flow path and on the wetted surface, and they are formed by a hand process rather than moulded under pressure.
This does not make a welded fitting unsuitable for aggressive duty — it is the standard construction for large duct and it performs. It does mean that a claim to be resistant to a given medium has to be a claim about the weld as well as the wall, and the way to check it is the sample test result rather than the material data sheet. The comparison with FRP duct works through how the two materials differ once the joint is included in the comparison rather than excluded from it, and the comparison with PVC duct covers the case where a different thermoplastic is the better answer to the same chemistry question.
Velocity: the One Limit the Calculation Sets
Velocity is the limit a designer controls directly, and fittings are where it hurts most, for two reasons. The first is the arithmetic already shown: every fitting loss scales with velocity squared, so a 20% velocity increase raises the fitting pressure by 44% before anything else changes. The second is abrasion. A bend is where the airstream is thrown against the wall, so a bend carrying particulate is the first place a duct wears through, and the higher the velocity the faster it happens.
The practical consequence is that the velocity limit is set by the dirtiest thing in the stream rather than by the cleanest. A run carrying dust should be designed to the velocity that keeps the dust moving without grinding the bends, and if a client asks for a smaller duct to save space, the honest answer is that the saving comes out of the elbow wall thickness. Our standard wall through a bend is the same as the duct it connects to; where a run is abrasive, the bend is the component to specify heavier rather than the whole run.
Sizing and Routing a Fitting Run
Routing a fitting run starts from the sizes the fittings have to match, and those sizes are not a single figure. A duct section is defined by its outside diameter, its wall thickness and its delivered length together, and the wall is what fixes a fitting’s weight and its weld preparation. The full PP duct sizes series, with the metric-to-inch table and the section lengths, is in our guide to PP duct sizes.
Fittings are chosen, but a run is designed. Most of the fitting decisions that matter are made in the first hour of layout, before a single component is picked, and they are made by choosing a velocity, a route and a reducer count. Getting those three right is worth more than any amount of shopping between suppliers.
Velocity First, Then Diameter
The order matters. Fittings are priced and sized by the duct diameter, so it is tempting to start with the diameter the site can accommodate and work back. That inverts the physics, because every fitting’s pressure cost is fixed by the velocity and only the duct’s own friction depends on the diameter. A run sized down to save space pays for it in the fittings, and the fittings are where most of the pressure was already going.
Industrial exhaust runs in polypropylene are generally designed between roughly 8 and 12 m/s, and the practical band narrows once the stream carries anything. Below about 8 m/s, dust settles out of the airstream and pools at the low points of the run. OSHA’s ventilation guidance gives that floor a name — the minimum transport velocity, the lowest velocity that still moves particles in a duct with little settling, varying with air density and particulate loading — and records that inadequate transport velocity is one of the two classic causes of a plugged duct, the other being vapour that condenses in the run and wets the particles into a deposit. Its own working band for industrial ductwork is faster and wider, 2,000 to 6,000 feet per minute, or roughly 10 to 30 m/s, because that guidance is written for metal duct where a fast airstream is cheap; on a thermoplastic fume run the ceiling is set instead by the fan power, which scales with the square of the velocity, and by the erosion of the bends; above about 12 m/s, the pressure cost climbs steeply because it is squared, and a particulate-laden stream starts eroding the outside of every bend. Pick the velocity from what is in the air, derive the diameter from the flow and the velocity, then accept the diameter that comes out. The PP duct range is stocked in the standard bores up to φ500 mm, so the answer will normally land on a size that exists.
Keeping the Turn Count Down
A single 90° bend made as a mitre is worth roughly 25 metres of straight duct in pressure terms, and the arithmetic in the worked example earlier showed that three of them can outweigh the duct they sit in. That makes route selection the fitting decision with the largest single effect available, because turns are counted rather than bought.
Two habits do most of the work. The first is to replace a 90° turn with two 45° turns wherever the layout has the length for it, since the two 45° bends together cost far less than one square 90°. The second is to route the long, straight header first and the branches second, rather than drawing duct around the equipment and letting the turns fall where they land. A layout that has been drawn around a machine will have more bends than one drawn between two points, and the difference is permanent fan power.
Where a 90° turn is unavoidable — and on most industrial layouts some are — specify it as a moulded long-radius bend or a fabricated bend with a proper radius, not as a mitre. The 90° duct elbow page covers the radius options, and the earlier elbow section sets out why the radius ratio beats everything else in the fitting specification.
Where to Put the Reducers
Reducers are the fitting most likely to be placed badly, and they are the ones with the largest direction-dependent penalty. Three rules cover nearly every case.
Expand by no more than one standard size per transition, as the reducer section set out. Put the reducer in a straight run, not immediately at the throat of a bend: a reducer bolted directly to an elbow outlet presents the expansion into an airstream that is still turning, and the separation that follows is worse than either fitting’s own coefficient. And mark the flow direction on the component as well as the drawing, because a symmetric cone installed backwards is a designed contraction turned into an accidental expansion, and nothing about the fitting itself looks wrong.
Where a long transition is needed, remember that our standard square-to-round length of one and a half times the round-end diameter is a starting point rather than a limit. Asking for a longer transition before the fitting is built costs a little extra sheet and weld; asking for it afterwards costs a new fitting.
Branch Take-offs and the Equal Tee Trap
A branch take-off is where the losses stop being intuitive, because a tee is three different fittings in one body. Reading flow straight through the run is cheap; turning into the branch costs several times more; and a branch that has been blanked off costs almost nothing to the main flow but still cost the fitting and the flange. The angle at which the branch meets the run belongs in the same decision: OSHA’s ventilation guidance lists branch entries that enter the main duct at sharp angles among the named causes of poorly performing ductwork, and defines the branch as the leg carrying the lowest volume flow, which usually enters the main at less than 90°.
The trap is the equal tee used as a reducing tee. A duct tee with the same bore on all three legs, used to feed a smaller branch through an added reducer, costs two fittings and an extra pressure drop where a single reducing tee would have done the job. Where the branch is a different size — which is the normal case — the reducing tee should be the default, not the fallback. The tee and cross section above has the coefficients for each of the three flow paths.
Specifying Fittings So They Arrive Right
The majority of fitting problems are not manufacturing problems. They are drawing problems: a bolt pattern that was never fixed, a radius ratio that was never stated, a reducer whose flow direction was never marked. All three are free to fix and expensive to discover on site, and all three are fixed by writing the order properly the first time.
What Belongs on the Drawing
A fitting drawing can be short, but it needs six things on it, and a drawing missing any one of them will eventually produce a fitting that does not fit.
| Item | Why it has to be on the drawing |
|---|---|
| Bore and wall thickness | The bore sets the flow area; the wall sets the mass, the support load and the weld preparation |
| Connection method at each end | Socket weld, butt weld, flanged or solvent bonded — decided per end, not per fitting |
| Radius ratio on every bend | A drawing that says “90° elbow” and nothing else can be supplied as anything from ζ 0.2 to ζ 1.3 |
| Centre-to-face and centre-to-end dimensions | A fitting with the right bore and the wrong length shifts everything downstream of it |
| Material grade | The grade determines the temperature band and the chemical resistance, and a claim to “PP” alone does not |
| Direction of flow | Decisive at reducers and at branch take-offs, and invisible once the component is made |
The connection method is the item most often left to the fabricator, and it is the one that changes the loss. A flanged end and a butt-welded end on the same elbow are the same shape and different joints, and the tables’ flanged column is the one that applies once a flange is bolted on. Deciding it at order stage costs nothing; changing it after the fitting is welded costs a new fitting.
The Fitting Schedule
For anything beyond a handful of parts, the drawing is not the right vehicle and a schedule is. A schedule is a single table listing every fitting with its dimensions in columns, and it does three things a set of drawings cannot: it makes the quantity of each item explicit, it makes a missing dimension obvious because the cell is empty, and it lets a supplier quote line by line so that a price can be compared component against component rather than as a lump sum.
A workable schedule carries a line per fitting type and size, with columns for quantity, bore, wall, the connection at each end, the radius or transition geometry where relevant, and the material grade. Where a fitting is part of a run, a reference to the isometric or the line number ties it to the layout. Ten minutes spent on the schedule removes the class of problem where a supplier quotes the standard elbow because the drawing implied one, and the site receives a mitre.
Two Ambiguities That Cost the Most
The first is flow direction at a reducer. A cone is a symmetric shape, and a run drawn without an arrow on the reducer can be installed either way round with nothing visibly wrong. Correctly oriented, a reducer working as a contraction is close to free; reversed, the same component is an expansion and costs a multiple of that. Put an arrow on the drawing at every reducer and every transition, and mark the component itself before it leaves the fabricator.
The second is the bolt pattern on a rectangular flange. There is no useful international standard for it, so the pattern is whatever the two parties agreed, and if the agreement was a note saying “standard” then there was no agreement. Fix the pattern on a dimensioned drawing at order stage, and dimension the bolt holes from a corner of the rectangle rather than from its centrelines — centreline dimensions are read from different edges by different people and corner dimensions are not.
Both of these are the same category of mistake: a decision that is cheap on paper and impossible in the plant. Each of the fitting sections above closes with the same advice in its own terms, and it is the same advice here — write it down while the fitting is still a drawing. Where a pattern or an orientation is genuinely ambiguous, it is better resolved with our engineers before the order is placed than with the fabricator after the first flanged joint fails to line up.
Price, Lead Time and What Drives Both
A fitting’s price is set by how it was made, and the two routes have completely different cost structures. Knowing which one dominates a given component tells you what to negotiate and what to leave alone, and it explains why the cheapest quote on a schedule is not always the cheapest schedule.
How a Fitting Is Priced
A moulded fitting is priced from tooling, material and machine time. The material cost scales with the mass, which is why a long-radius bend costs more in resin than a mitre of the same bore. The machine time is roughly fixed per shot regardless of the bore, so the price per kilogram falls as the fitting gets smaller and rises as it approaches the capacity of the press. And the tooling is a one-off that has to be amortised, which is the reason a moulded fitting is inexpensive in quantity and unreasonable in ones.
A fabricated fitting is priced from material and labour, and the labour is welding hours. It has no tooling to amortise, so a one-off fabricated part is economically sensible where a moulded one is not, which is exactly why rectangular fittings and square-to-round transitions are fabricated. Its cost scales with the number and length of seams rather than with the mass, which is why a fabricated transition with eight segments costs several times a moulded bend of the same bore even though the two weigh comparably.
The practical reading is this: for a standard round fitting in a standard bore, in any quantity, the moulded part is the cheaper part and the better part. For a one-off, a non-standard bore, or a rectangular shape, the fabricated part is the only part. There is nothing to arbitrate between the two in either case.
Where the Schedule’s Money Actually Goes
The component prices are rarely the largest line on a fitting schedule. The items that drive the total are the ones that consume fabrication hours or generate change orders, and they are worth watching in this order.
The first is anything rectangular, because it is hand-built and cannot be moulded. The second is the transition count: every square-to-round is a fabricated part with a lead time measured in working days rather than in stock availability. The third is the bolted joint count, since flanges are a per-joint cost in both material and welding, and a run designed with more flanged joints than it needs is paying for accessibility it will never use. The fourth, and the one most often missed at quotation stage, is the change order: a reducer supplied in the wrong orientation, or a rectangular flange made to a pattern nobody wrote down, is a new fitting rather than a repaired one.
None of these are arguments for buying the cheapest elbow. They are arguments for spending the design time where the money is, which is the layout and the schedule rather than the unit price.
Lead Time Is a Fabrication Question
Lead time follows the same split. A moulded fitting in a listed bore comes off tooling and is available quickly, and the constraint is stock rather than manufacture. A fabricated fitting is bound by welding hours, so its lead time is a shop-capacity question: our standard fabrication lead times run about 7 to 18 working days for a square elbow and about 10 to 20 working days for a square-to-round transition, the difference being the seam count and the developed-pattern work.
The lead time that catches people out is the one caused by the drawing rather than the shop. A fabrication shop cannot start on a part whose bolt pattern is still being agreed, and a pattern agreed in week three of a ten-day lead time has added two weeks by itself. Getting the dimensions settled before the order is placed is worth more schedule than any pressure on the supplier’s delivery date.
What the Fan Power Adds to All of It
The purchase price is not the whole cost, and the section that worked through a real run put the rest of it in numbers: the difference between a moulded long-radius elbow set and a fabricated mitred set on the same 24-metre run was 233 W of fan shaft power, or about 2,040 kWh a year on continuous duty. Whether that converts into an annual cost that dwarfs the price difference between the two fitting sets depends entirely on the reader’s electricity rate and operating hours, and the article states the rate it used rather than assuming one.
What can be said without a rate is the direction. On any run that operates continuously and holds its design flow, the fan power difference between good fittings and cheap fittings accumulates every year, while the purchase price difference is paid once. On a run that operates a few hours a week, the purchase price is the whole story. The velocity, the hours and the medium decide which of the two a given project is, which is why the sizing section puts the velocity decision ahead of the purchasing one.
Checking a Fitting When It Arrives
Incoming inspection on duct fittings is short, and it is worth doing because the defects that matter are visible or measurable in a few minutes each. The three checks below cover wall, weld and paperwork, and between them they catch nearly everything that would otherwise show up as a pressure loss, a leak or a failed joint.
Wall Thickness, Ovality and Fit
The wall is the first thing to measure, and the place to measure it is the throat of a bend. A moulded fitting draws its wall from a parison or a melt flow, and the outside of a bend tends to come out thicker and the inside thinner, so a nominal 4.2 mm wall can read noticeably thin at the inner radius. A micrometer at four points around the throat takes a minute and is the difference between knowing and assuming.
Ovality matters on the larger moulded bores, because a fitting that has gone out of round while cooling will not socket onto the duct it is meant to join. Lay a straight edge along the bore, or measure the inside diameter at two angles ninety degrees apart. A part that has been stored badly and distorted can also be re-rounded by careful warming, but a part that was moulded out of round cannot, and the check is what tells the two apart.
Fit is the third item and the one most often skipped. Measure the bore the duct has to enter, the centre-to-face dimension and, on a flanged part, the bolt circle. A fitting whose dimensions are correct on paper and one millimetre out on the bolt circle is a fitting that will not bolt to anything, and the error is found either on a bench or on a ladder.
What a Weld Should Look Like
Welds on polypropylene duct are inspected visually, every one of them, and there is no routine radiography on this material to fall back on. A good hot-gas weld bead is smooth, uniform in width and height, well fused into both sides of the joint, and free of the visible defects that indicate a problem with the procedure or the operator.
The specific things to look for are voids and pinholes in the bead, a bead that is unfused along one edge, undercut where the bead meets the parent material, and discolouration that suggests the material has been overheated or burned. On a butt-welded joint, check the internal bead as well if the joint can be reached: a bead protruding several millimetres into the bore is not a coefficient problem as the joints section explained, it is a defect, and it should have been dressed back flush at the fabricator. A visible, well-formed, uniform bead on the outside and a flush bore inside is what a correctly made joint looks like.
The welded elbow and the moulded elbow are made by different routes and are inspected differently in one respect: the moulded part is inspected for wall and shape, since it has no fabrication welds at all, while the welded part is inspected for both.
Documentation and Test Samples
The paperwork is the part of inspection that a buyer can specify in advance, and it is the part that separates a supplier who controls the process from one who hopes. Three documents do the work, and they are the ones worth asking for before the order rather than after the delivery.
The first is the material certificate: the grade of polypropylene actually supplied, against the grade specified. A claim to “PP” with no grade is not a specification, and the material specifications referenced in the flange section are what a grade can be checked against. The second is the welding procedure, the document that fixes the parameters for hot-gas and extrusion welding of polyolefins and that should be written against the recognised thermoplastic welding standards. The third is the test result: destructive bend or tensile tests on sample welds cut from the same procedure and made by the same welder, which is how a shop demonstrates that its procedure is producing sound joints rather than merely existing on paper.
What our own fabrication carries, and what is worth asking any supplier for, is that combination: a documented material grade, a qualified welding procedure, qualified welders, and sample test results behind them. Our welders average about eight years of polypropylene-specific fabrication experience, which is the kind of figure a qualification record makes checkable rather than a claim.
Frequently Asked Questions About PP Duct Fittings
These are the questions that come up most often once the specification is being written, answered directly. The sections above carry the working behind each one.
What is the difference between a PP duct fitting and a PP pipe fitting?
They serve different systems and are sized differently. A PP duct fitting belongs to an air or fume handling system: it is sized by the volume flow and the velocity, it is specified by outer diameter and wall thickness, and it is designed for pressure losses measured in tens or hundreds of pascals. A PP pipe fitting in the pressure-pipe sense belongs to a liquid system: it is sized by the pipe’s pressure class, it is specified by nominal bore and schedule, and it is built to hold internal pressure rather than to conduct air. The published pipe-fitting coefficient tables are useful for the underlying coefficients, as the loss method section explains, but they are not a specification for a duct system.
What sizes do PP duct fittings come in?
We mould single-piece fittings up to φ500 mm outer diameter, in the standard bores from φ110 mm upward, and fabricate above that size. The wall thickness follows the duct it connects to: 3.0 mm at φ110 and φ160, 3.3 mm at φ200, 3.6 mm at φ250, 4.2 mm at φ315 and φ355, 4.5 mm at φ400 and 5.5 mm at φ500. Rectangular fittings are made to order rather than to a size list, since there is no mould for a shape that is specified per project.
What temperature can PP duct fittings handle?
The published operating range for our duct fittings is −10 to +90 °C. Polypropylene homopolymer is often discussed in a continuous band up to 100 °C, and those figures describe the resin rather than a welded component. On a fitting the governing limit is the joint, because a weld bead and a socket recess are where the material first relaxes under sustained heat, so designing inside 90 °C leaves something in hand and designing at the resin’s upper figure does not.
Which fittings can be moulded, and which have to be fabricated?
Bends, tees, crosses, reducers and couplings in the standard bores can all be moulded, and a moulded fitting has no internal joint anywhere in the flow path. Square-to-round transitions and rectangular elbows and flanges have to be fabricated from developed flat patterns and seam welds, because a per-project shape cannot be tooled. The PP duct fittings range lists what is available moulded and what is fabricated to drawing.
How much pressure does a fitting add to a duct run?
It depends almost entirely on how the fitting was made and how tight the bend is. At a velocity of 10 m/s the dynamic pressure in the airstream is 60 Pa, and the coefficient multiplies that figure. A moulded long-radius 90° bend adds about 15 Pa; a moulded regular-radius bend about 30 Pa; a fabricated mitred bend about 78 Pa. Across a run with several bends and a branch, the fittings typically account for half to three quarters of the total system loss, which is the point the worked example makes.
Can PP duct fittings be welded on site?
Yes, and hot-gas and extrusion welding are the normal site methods for polypropylene duct. What matters is that the site weld is made to the same qualified procedure as the shop weld, by a welder qualified for the material and thickness, because a site joint is the one that gets the least inspection and the most thermal movement. Socket welding is the tolerant method for tight access; butt welding is used where a flush bore matters or the duct is too large to socket.
How do I order a rectangular fitting?
Send a dimensioned drawing rather than a description. For a flange, that means the outside dimensions, the plate thickness, the bolt hole diameter and the bolt pattern dimensioned from a corner of the rectangle. For a transition, it means the round-end diameter, the rectangular-end dimensions, the overall length and the connection type at each end. A dimensioned drawing removes the ambiguity that a note saying “standard” leaves in place, and it is the one thing that most reliably stops a rectangular fitting arriving wrong.
Get a Fitting Schedule Priced Against Your Actual Run
Everything above is a method, and a method needs your layout to produce an answer. We mould the fittings we sell, so the useful output is not a catalogue page — it is a fitting schedule for your run, with the losses and the masses filled in and the moulded-versus-fabricated choice made against your quantities and your lead time.
What to send us
Six inputs produce a real schedule rather than a price list:
- The flow and the velocity — air volume, or the duct diameter you have already fixed. If the velocity is still open, tell us what is in the stream and we will suggest one.
- The run — total length, and how many turns, branches and transitions it has. The turn count matters more than the length does.
- The connections — where the run needs to be flanged for access and where it can be welded, end by end.
- The medium — each chemical and its concentration, plus any dust or particulate. This sets the wall and the material grade.
- The temperature — continuous service and realistic peaks, since the joint governs the limit.
- The schedule — when the fittings are needed on site, and whether anything rectangular is involved.
What we will tell you
We will come back with a fitting schedule line by line: bore, wall, connection at each end, the radius or transition geometry, and whether each item is moulded or fabricated. We will state the pressure loss for the fitting set and what it does to the fan, so the choice between a long-radius and a mitred route is visible in the fan selection rather than buried in a catalogue. And where a drawing detail is ambiguous — a reducer orientation, a rectangular bolt pattern — we will raise it before the order is placed.
If your run has a high turn count or carries particulate, start with that fact when you write. Those are the two cases where the fitting decision moves the fan most, and both of them are cheaper to answer at layout stage than after the first set is built.
Send your six inputs through the contact page and we will come back with a fitting schedule, the losses for your run, and a quotation for the fittings as described.
Sources
- U.S. Occupational Safety and Health Administration – OSHA Technical Manual, Section III, Chapter 3: Ventilation Investigation (the coefficient-times-velocity-pressure form of a component loss; the definition of friction loss and the variables that set it; minimum transport velocity and the causes of plugged ducts; the industrial duct velocity band of 2,000 to 6,000 fpm; the named design defects including short radius elbows, sharp-angle branch entries and an undersized duct diameter; the six-and-three rule and system effect loss at the fan; and the definition of a branch).
- Hydraulic Institute – HI Data Tool: Pipe Fitting Frictional Losses (the fitting-coefficient method set out alongside the straight-pipe term; the guidance that resistance coefficients decrease as fittings get larger and that wide differences are found in the published values of K; the note that the published bend-curve data is not reliable below R/D = 1; and its Table 3.B.1 Approximate Range of Variation for K — roughly ±10% for a 45° elbow, ±20% to ±40% for a 90° elbow, and ±50% for couplings, unions and reducers).
- ASTM International – ASTM D4101: Standard Classification System and Basis for Specification for Polypropylene Injection and Extrusion Materials (the published materials specification against which a polypropylene grade for duct and moulded fittings can be checked).
- DVS (German Welding Society) – DVS-Regelwerk portal (the rules portal through which the DVS 2207 series, the reference framework for hot-gas and extrusion welding of polyolefins, is published).